Today, we’re going to explore the wonderful world of engraving aluminum stamping blanks with the KNK Force. Aluminum is a very soft metal, so this is more of a test of engraving settings rather than the Force’s ability to engrave.
Supplies
– KNK Force
– KNK Force Engraving Tool
– RMP Stamping Blanks, 1″ Round with Hole, Aluminum .040″ (18 Ga.)
– Scotch Double Sided Tape, 1/2 x 250 Inches, 3-Pack Caddy (3136)
– Scotch Sure Start Shipping Packaging Tape, 2 Inches x 800 Inches (145)
Method
I used Make the Cut to create the SVG file used in testing. Each aluminum blank has been cut using slightly different settings and close-up photographs are included for each.
Setup
Here’s a quick screencast on what I did in MTC to prepare the test SVG.
The font I used is named Aegina and is free to download.
Test – Engraving 18ga Aluminum
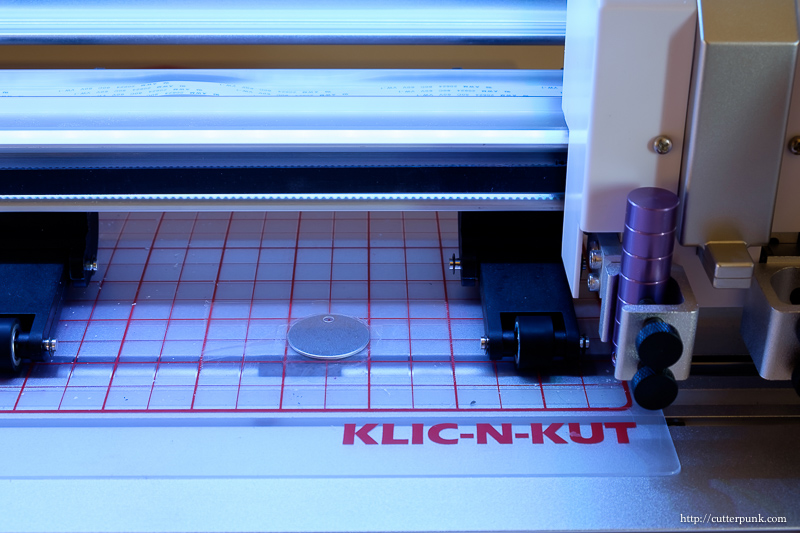
I applied a piece of double-sided tape to the exposed side of a blank and affixed it to the cutting mat, then remove the protective covering. With an oversized piece of shipping tape, I covered the blank and adhered the ends of the tape to the cutting mat while trying to minimize the air trapped. The goal here is to prevent the material from moving while engraving.

After uploading the SVG to C3, I set my first test to use these settings – Passes: 1
Cutting Depth: 10
Cutting Speed: 30
Up Speed: 40
Plunge Speed: 20
Lift Speed: 20
After beginning with a cutting depth of 10, I increased it by 10 on successive job runs until reaching a final cutting depth of 50. I ran one more test across two passes beginning at 30 and ending at 60.
Here are the results:
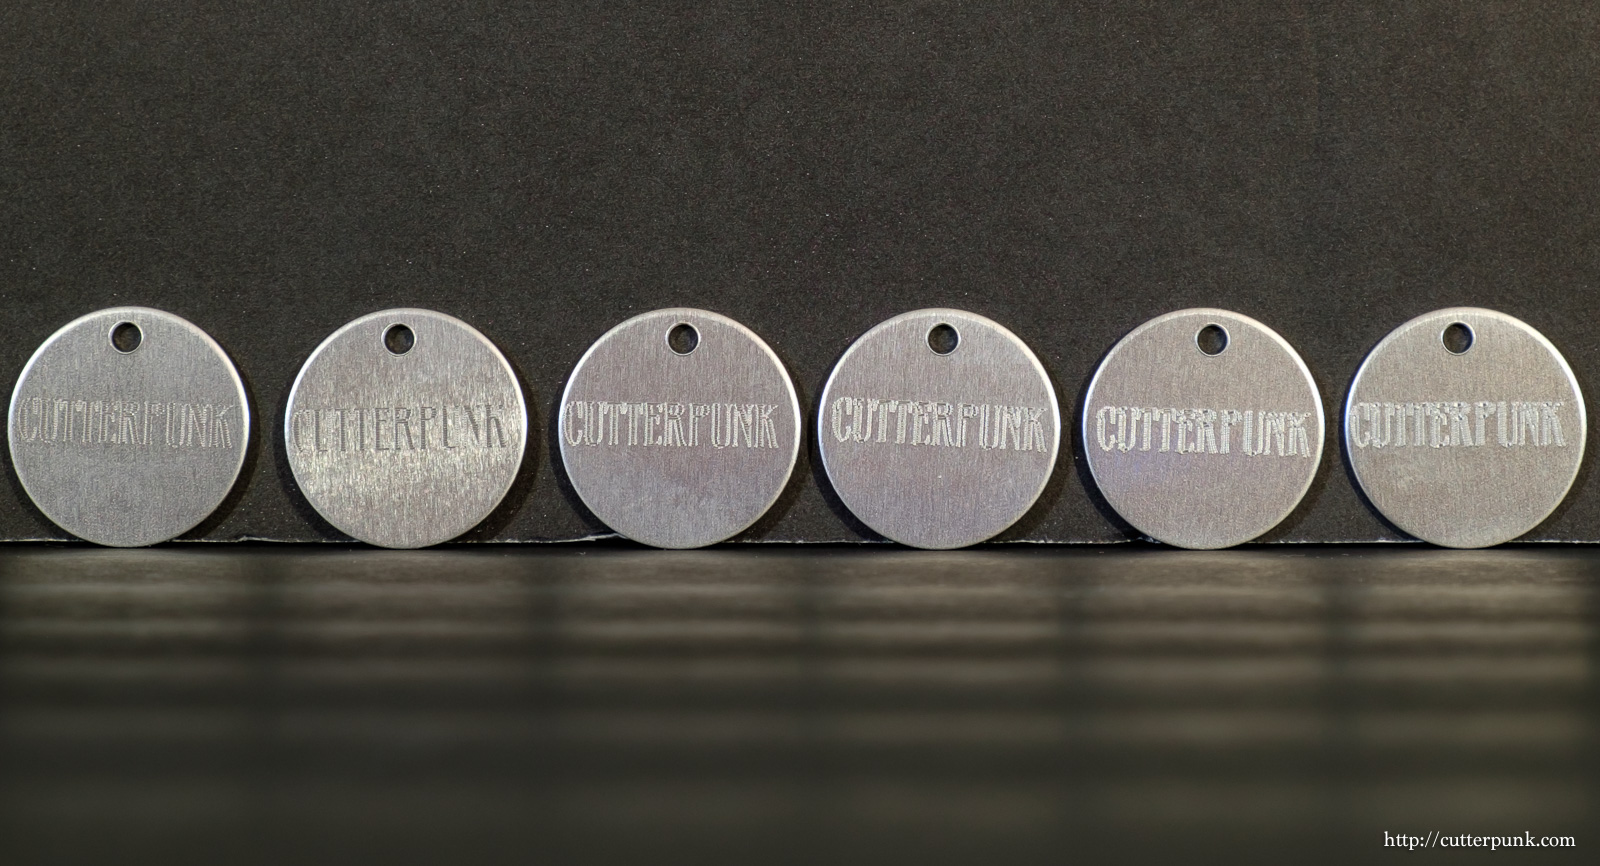
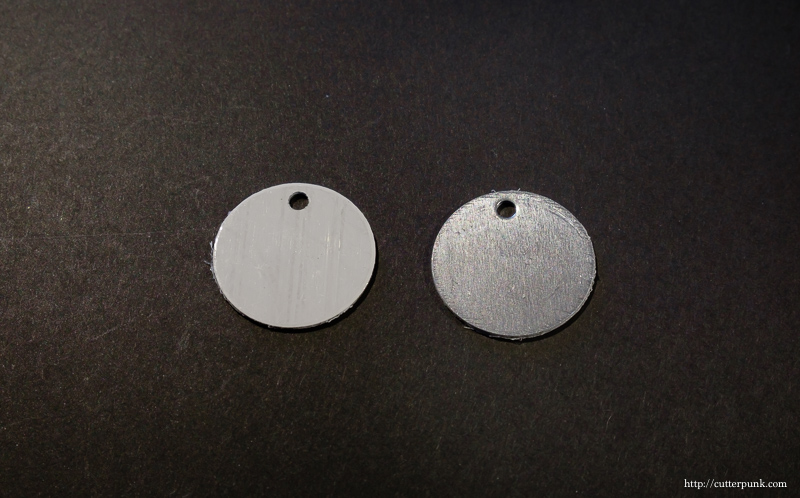
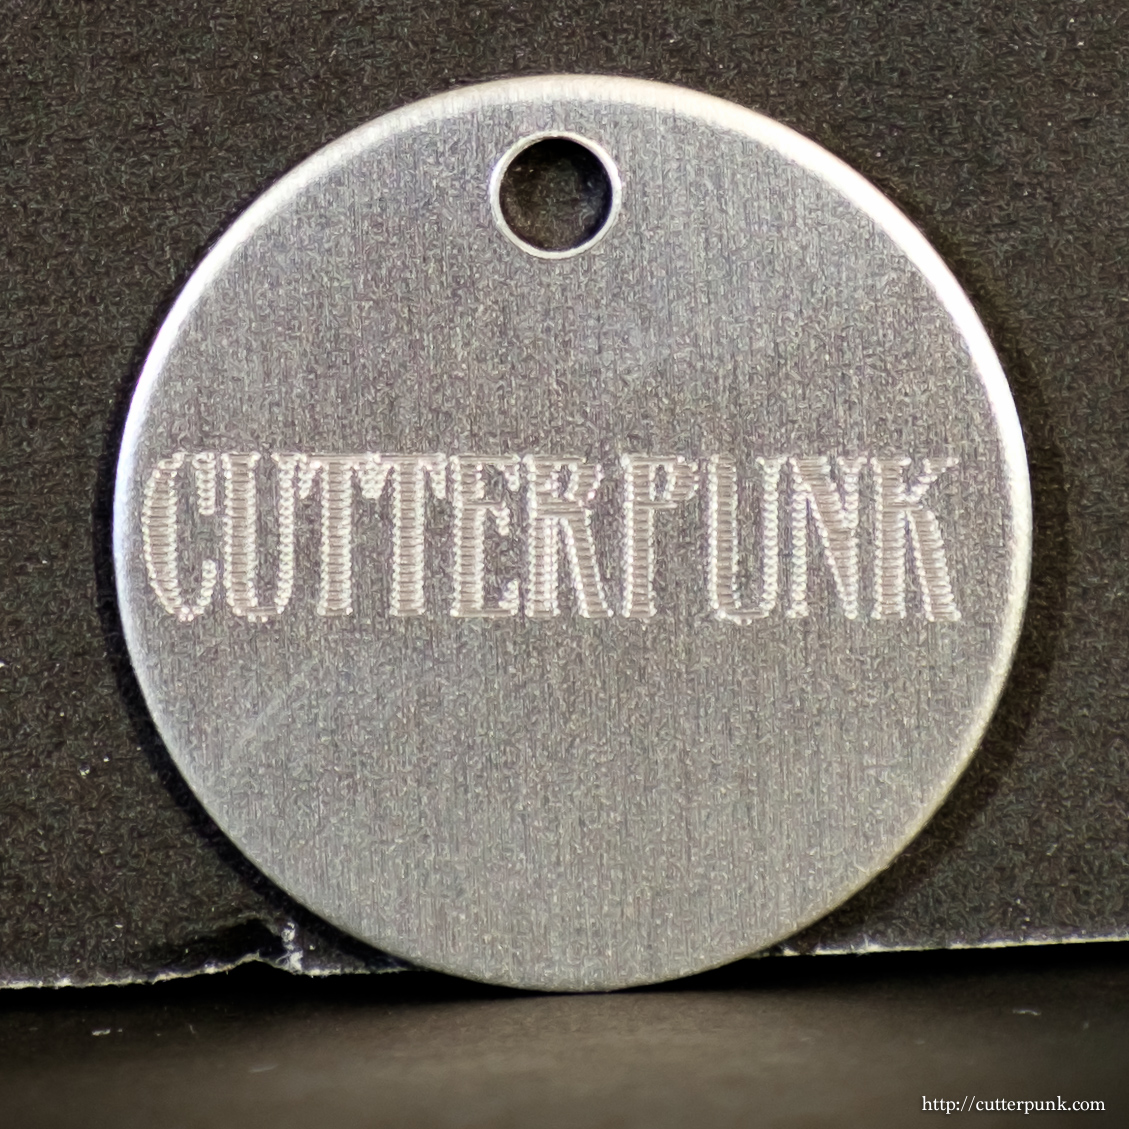
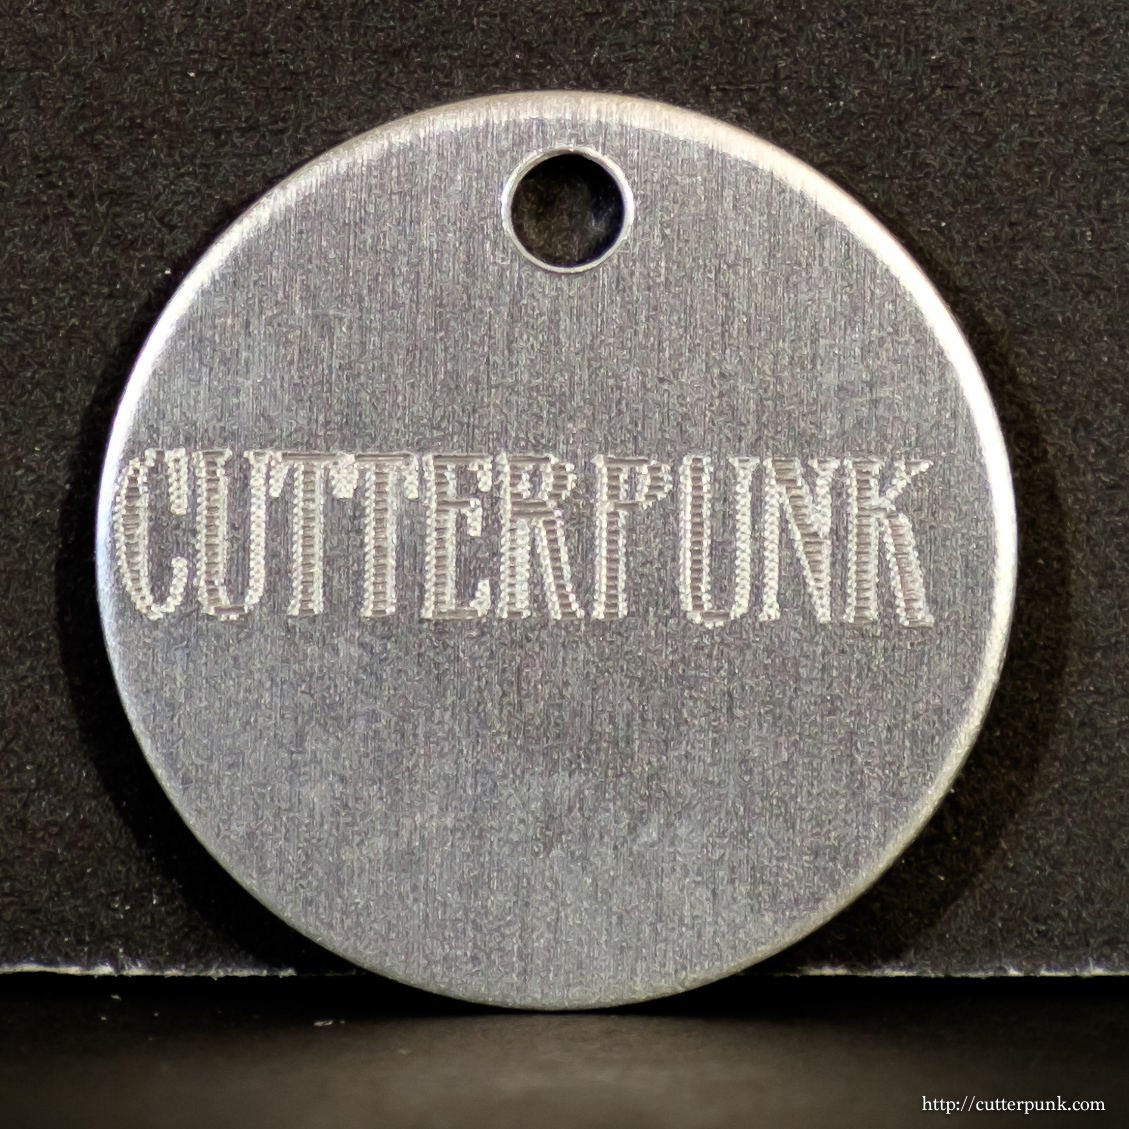
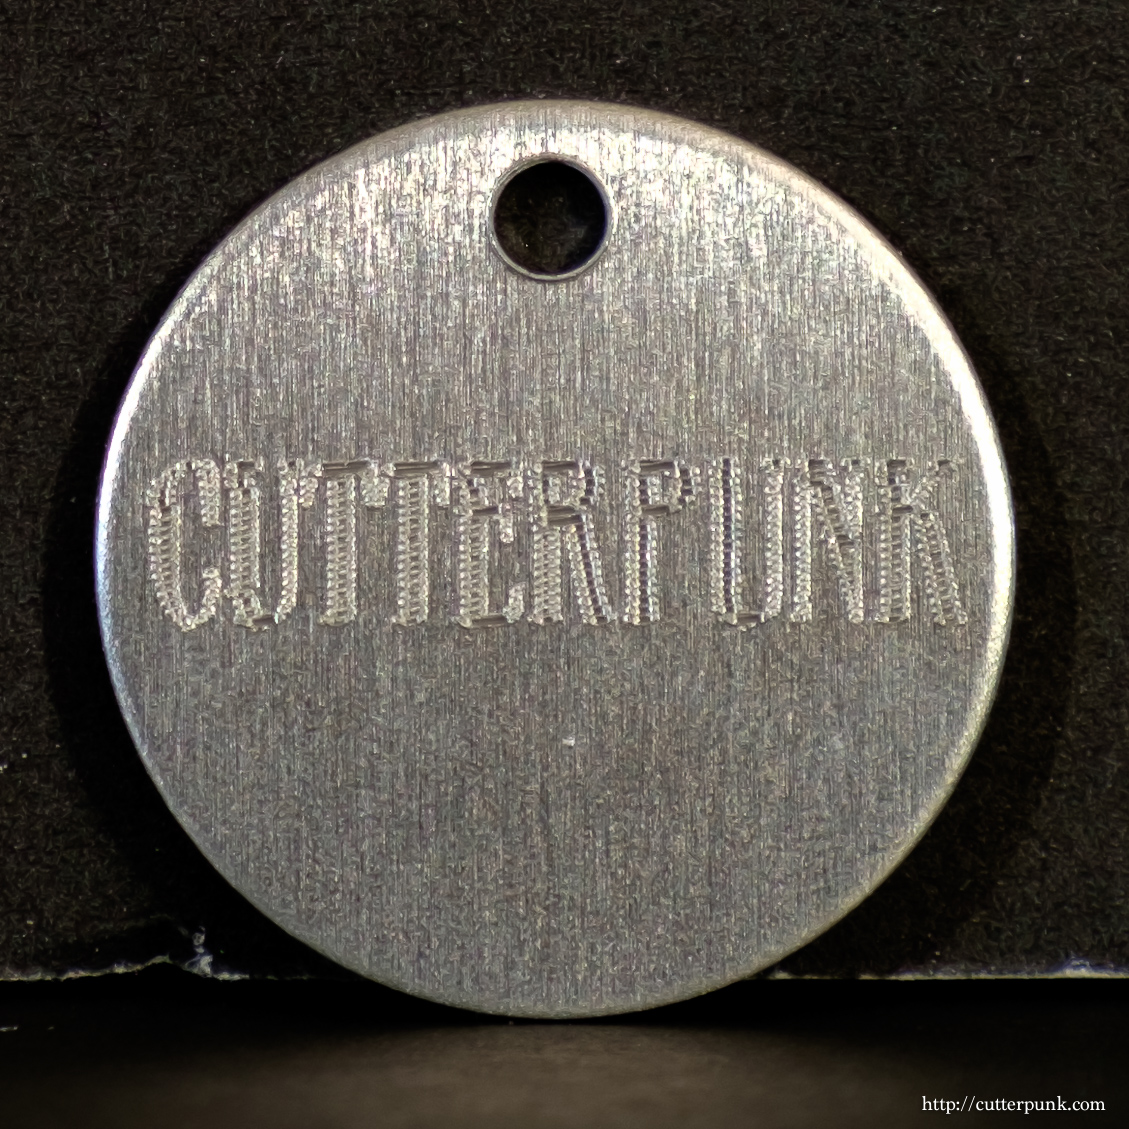
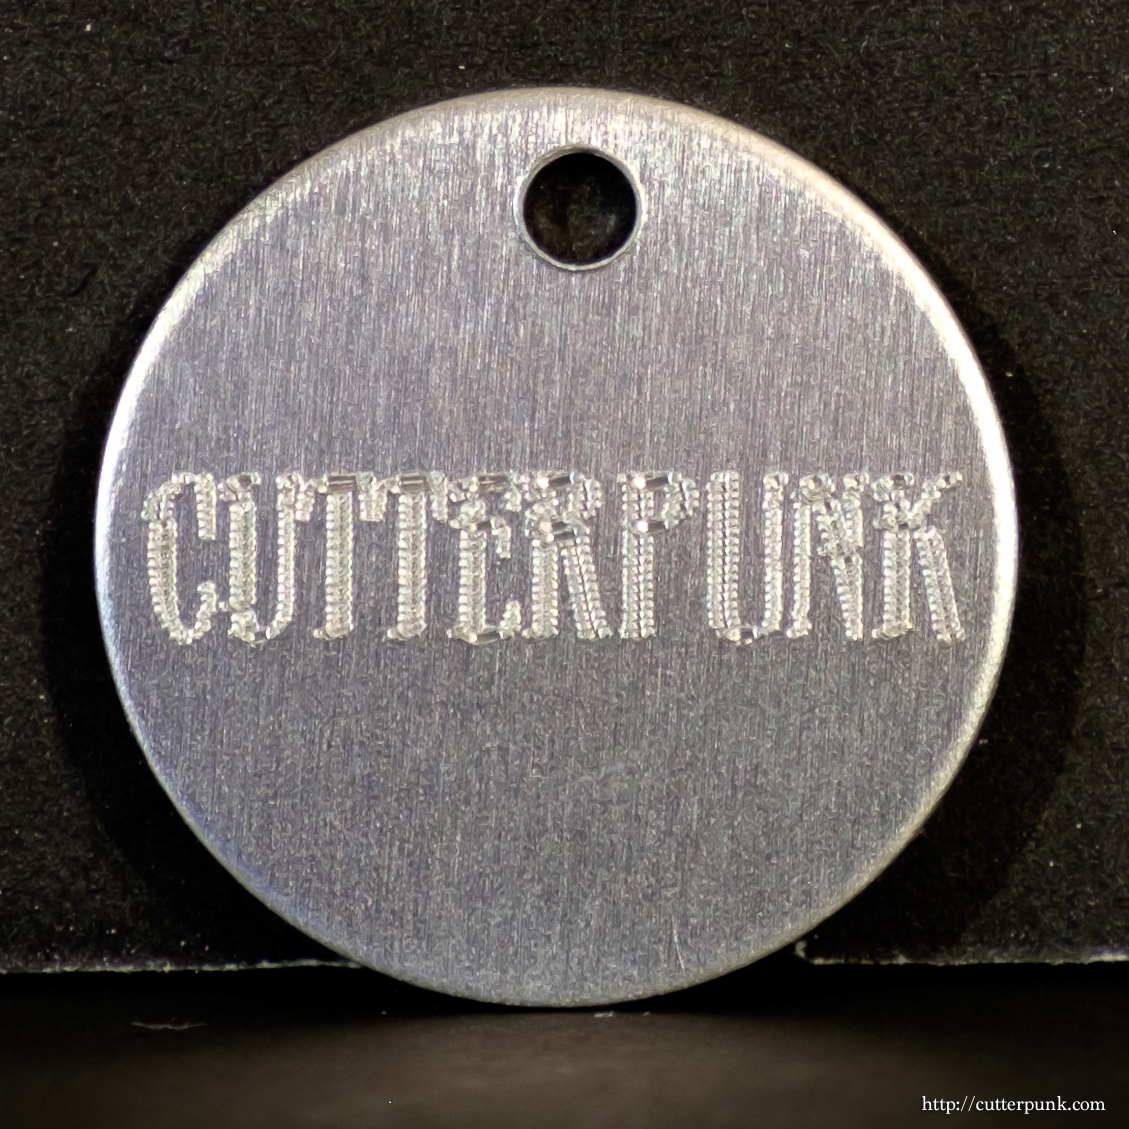
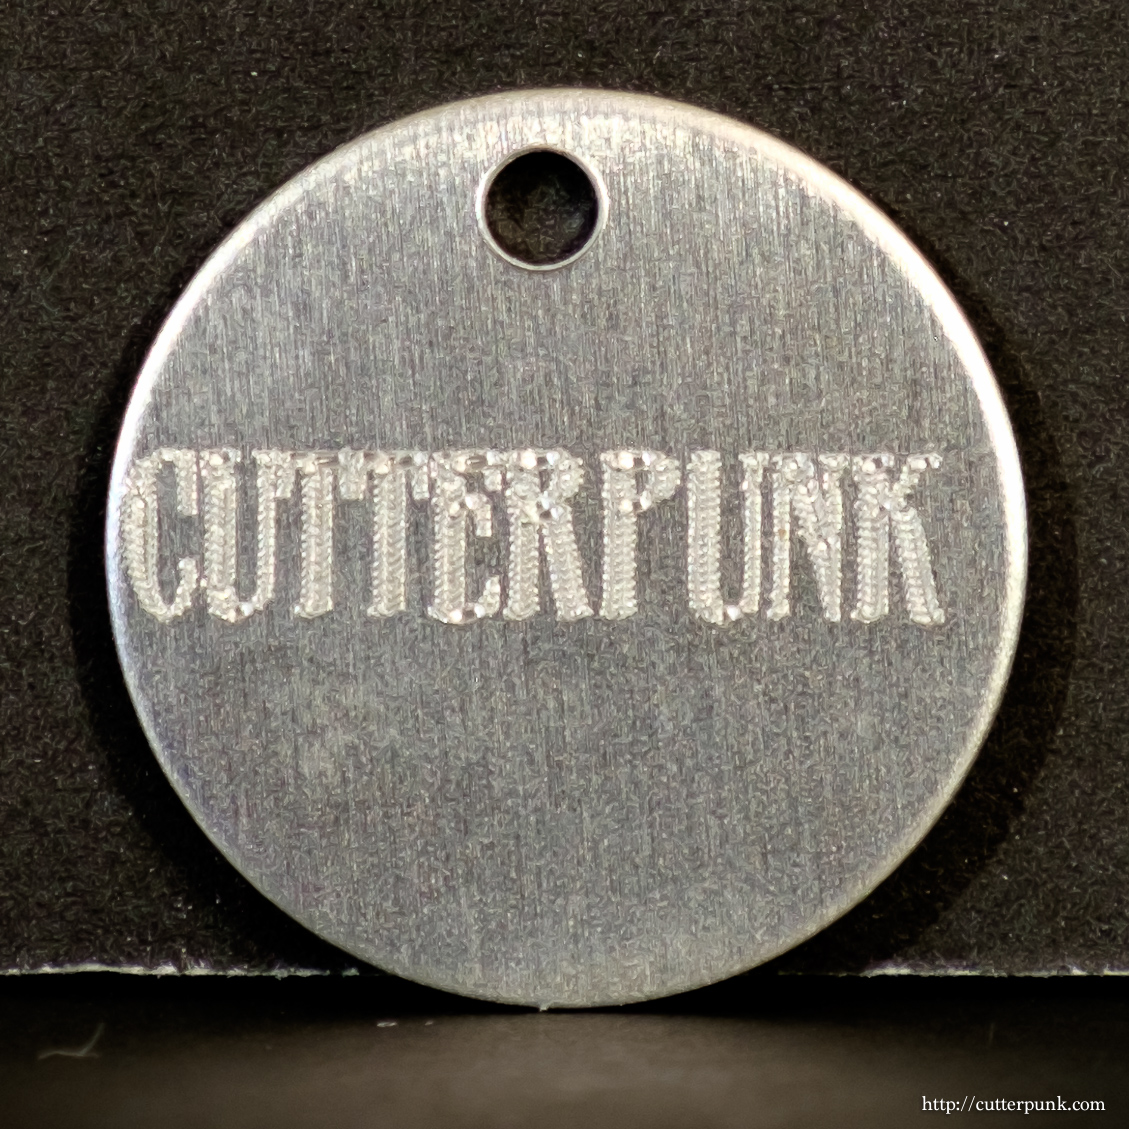
Please note that I did no polishing or finishing work on these. What you see is straight off the mat. And I realize it may be difficult to determine what you’re supposed to be looking at, so I’ll describe each of the results based on what my eyes see and fingers can feel.
At a cutting depth of 10, the borders of each letter are clearly defined. The engraving lines are neat and well defined. To the touch, it feels even.
Two out of two people agree that this looks and feels the same as it did with a cutting depth of 10, which is a good thing.
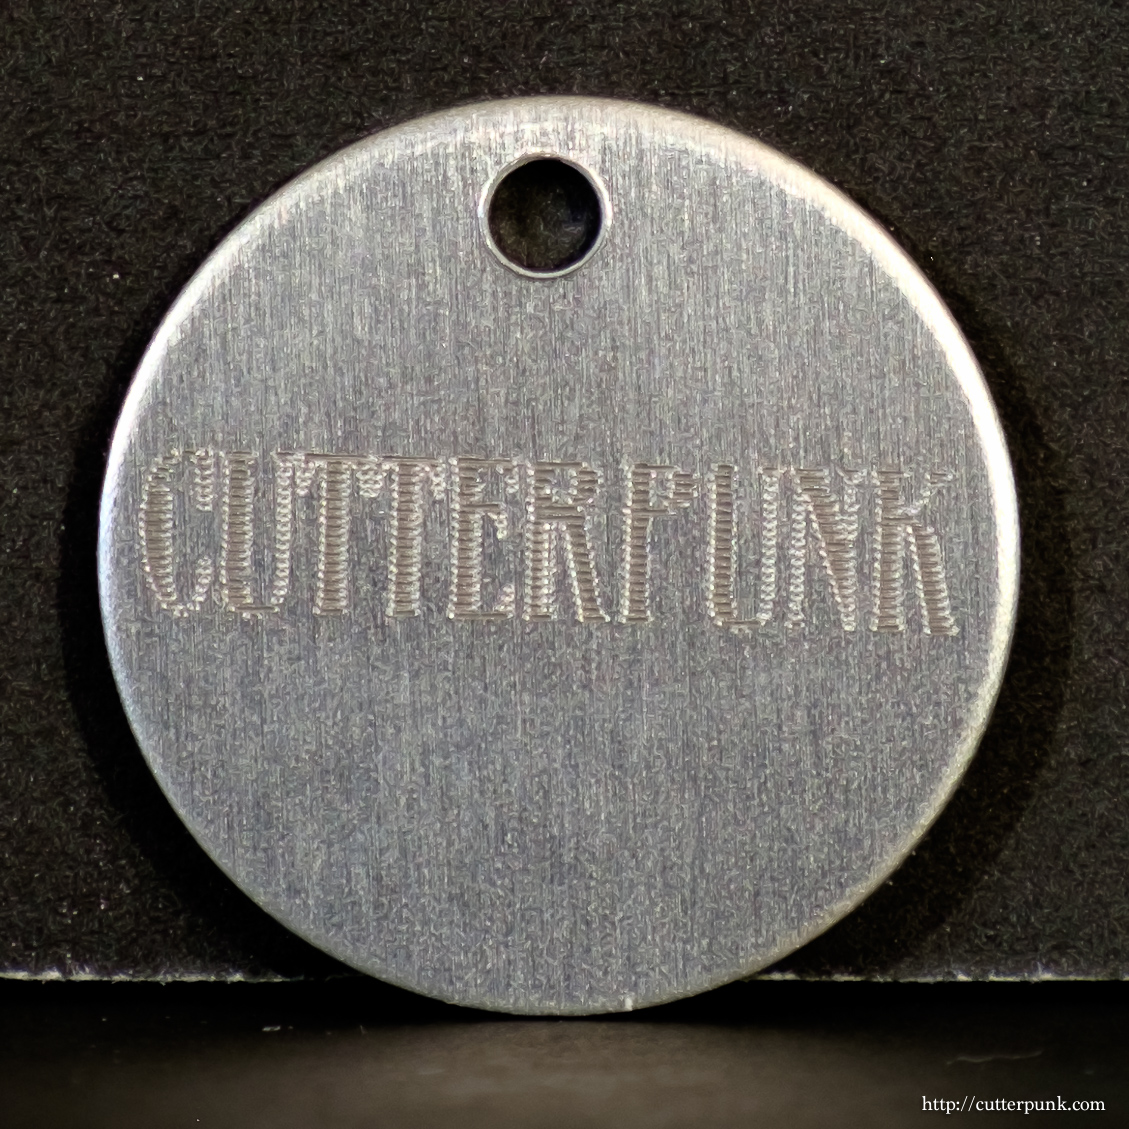
As we go a bit deeper at a cutting depth of 30, letter borders appear a bit less crisp, but still acceptable to my eyes. The engraving lines begin to distort slightly, but to the naked eye it looks fine.
As we move to a cutting depth of 40, the borders of each letter are becoming distorted. The peaks between the engraving lines are minimizing and the overall texture appears to smudge. To the naked eye, it isn’t awful, but it is clearly inferior to previous engravings.
Everything that was bad about the previous engraving is worsened when cutting depth is increased to 50. To my eye, the final product now looks cheap.
Just for kicks, I decided to try doing a second pass to increase the final cutting depth to 60. It’s more difficult to see the engraving lines in the final product and while the text may have lost crispness, it is more readable and generally better looking than a single pass at 50 to my eyes at a normal viewing distance.
Conclusion
Given the compromises between detail and readability, I see no reason to go beyond a cutting depth of 30. 25 could very well be the sweet spot for this material.
Additional Notes
Some of the negative effects of cutting too deep may be minimized after polishing and filling the engraved areas with gilder’s paste. I’ll post a follow-up soon so we can see some additional results and hopefully learn a bit more.
For polishing anything, I recommend Flitz. It’s non-toxic, smells good, and can be used on a huge variety of surfaces because it’s non-abrasive, unlike most polishes. I first used it when apprenticing in a piano restoration shop and if it’s good enough for a Steinway…
Thanks for reading! If you have any comments or questions, I’m happy to answer them to the best of my ability.
If you want to see some much better examples of engraving that the KNK machines can do, check out Karisa Doane’s Etsy shop. She’s got a small KNK family in her studio, 2 Zings and 2 Forces!
Comments
Darrel I love your blog! I really needed your engraving tips. I was definitely cutting too deep. Thanks for taking the time to share your wonderful crafts, I truly appreciate it.