When engraving a predefined shape, it can be difficult to achieve consistent alignment.
Print and Cut Registration Marks to the Rescue!
To download the Sure Cuts a Lot and SVG files used in this demo, click here.
Prerequisites
- Completed Print and Cut calibration with the blade in the left tool holder.
- Completed Dual Tool alignment calibration with the blade in the left tool holder and the engraving tool in the right tool holder.
Note: I always calibrate in mm. The offsets for my embossing tool are x(-1.8),y( 1.6). The offsets for my engraving tool are x(-1.8),y(1.5). Your offsets may vary. I calibrated the engraving tool to my blade holder using the AlignmentCalibration.svg file in Basic Shapes using a CD of 10 to score a piece of cardstock prior the cutting pass. This was enough to verify alignment.
SCAL Users: When transferring tool offsets to SCAL, the signs must be reversed. Thus, in SCAL my engraving tool offsets are x(1.8), y(-1.5).
For more information, please see either the C3 or SCAL user guides for the KNK Force.
Creating the Template
In your design software, create a shape that matches the item you’ll be engraving. If it’s not a simple shape, you can scan or photograph the item and pixel trace the image. Perform a test cut on some paper or card stock to ensure proper sizing. You want your piece to fit inside the cut, not rest on top of the edge.
Once your base shape is confirmed good, you may choose to duplicate it in rows and columns to do multiples. When engraving multiples, be certain your mat is flat and that there are no height differences across the surfaces of pieces to be engraved. If the engraving tool jams and the mat is unable to feed, the remainder of any engraving will be off.
Import the registration marks from the Basic Shapes file and place them on their layer. Add any engraved elements on their own layer. At this point, your file should contain 3 layers — registration marks, your cut template, and the engraving.
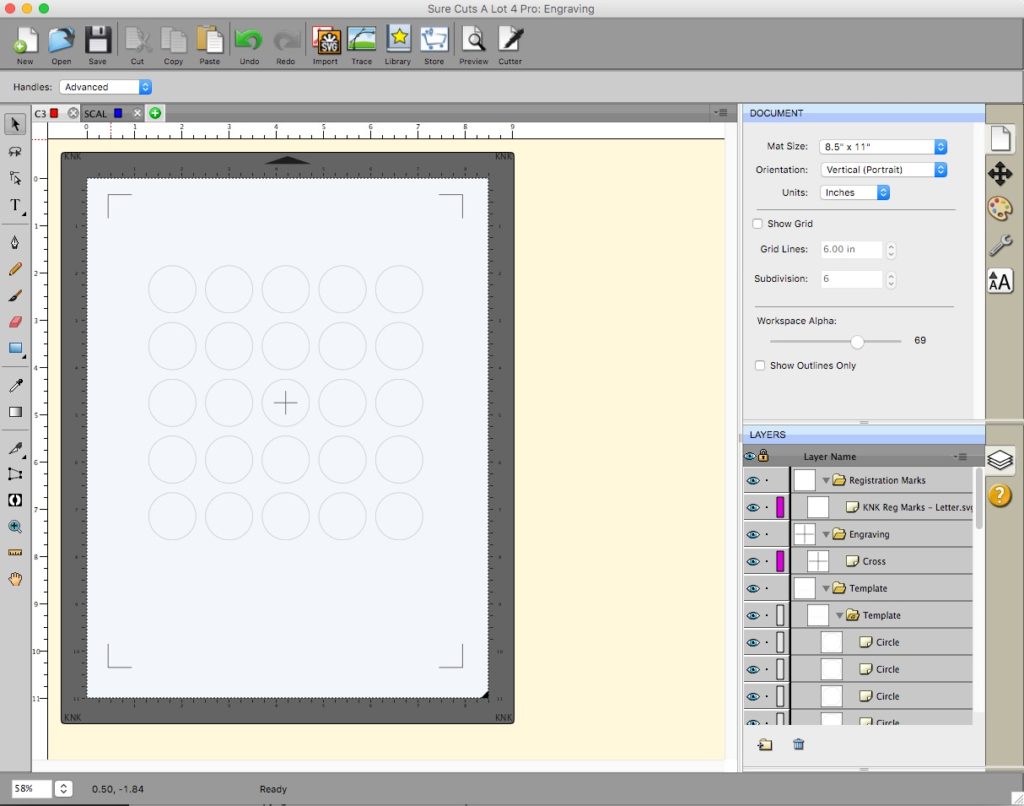
In the screenshot above, notice that I shifted the template shapes a bit higher on the page. This is how I know which side of the template is the top versus the bottom.
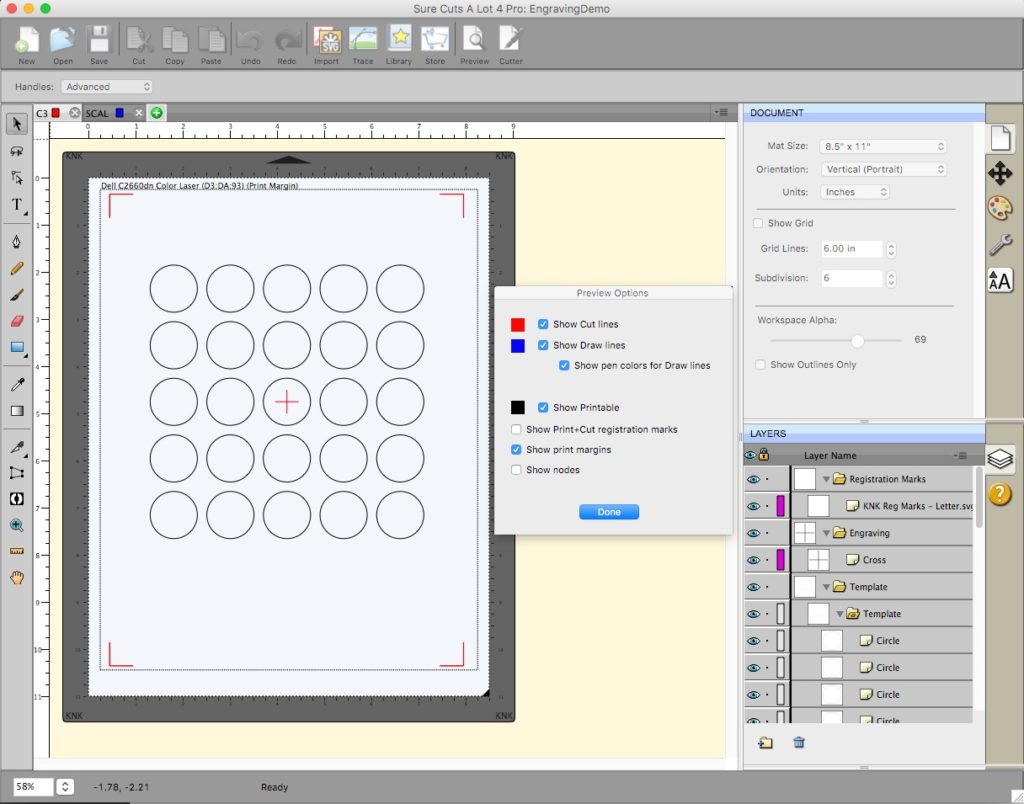
Always perform a Print Preview to ensure all shapes fit inside the boundaries of the printed page.
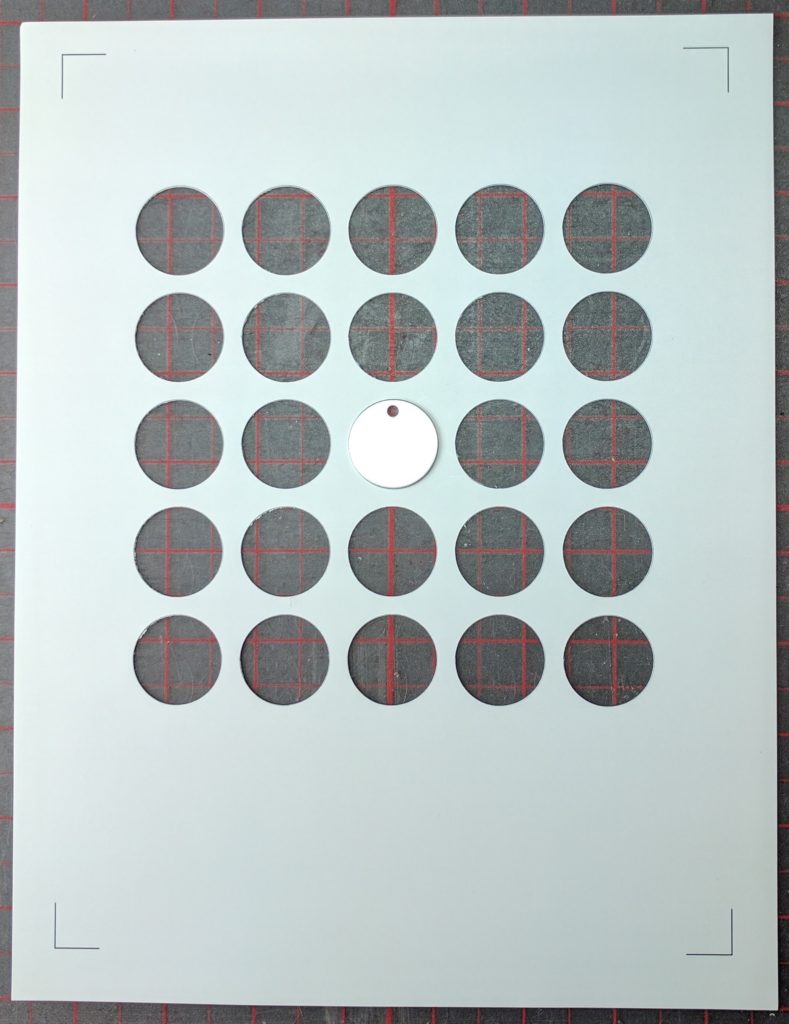
Print the file on your desired material. Since chipboard is a little hard to run through most printers, you can also cut a few templates and glue the layers together if you prefer something more substantial. Once printed, place it on your mat.

Cutting the Template
In C3, upload the SVG file for the template. Right now, we’re only going to cut our template. If you need to set the z-origin for the blade, do so now. For more information on setting the z-origin, check out this video.
Set the Registration Mark layer for Print and Cut in Advanced Settings. Set the Engraving layer to Do Not Cut. Set the cut settings for the Template layer appropriate for the material being used. Be sure your Blade Offset and Closed Path Overcut is set correctly.
Once you’ve confirmed cut settings are correct for each layer, click Prepare This Cutting Job and proceed through the Print and Cut process as normal to cut your template.
Using the Engraving Template
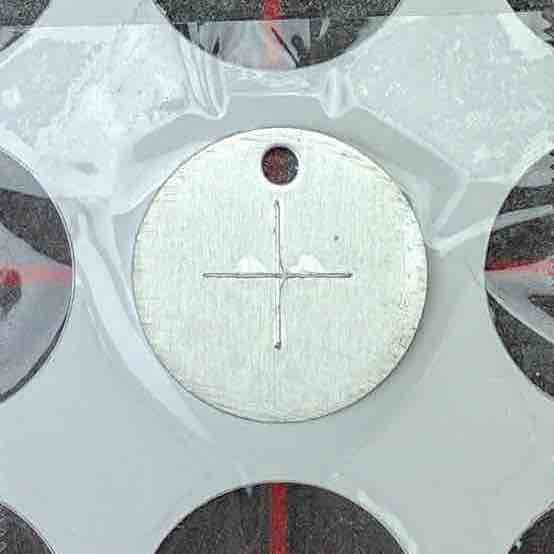
In C3, click Replace Right Tool and set the z-origin of the engraving tool on top the piece being engraved. Since the cross to be engraved is in the middle of the template, I placed my blank under the tool holder before inserting the engraving tool to set the z-origin.
Be very sure you are inserting the engraving tool at the correct step in the process; the tool holder should be lowered and the fan should be on. Don’t set the z-origin on the mat as you would when cutting with a blade as this will also cause the tool to apply far too much pressure against the material. Improper setting of the engraving tool’s z-origin will likely yield some loud grinding noises and can potentially damage your machine.
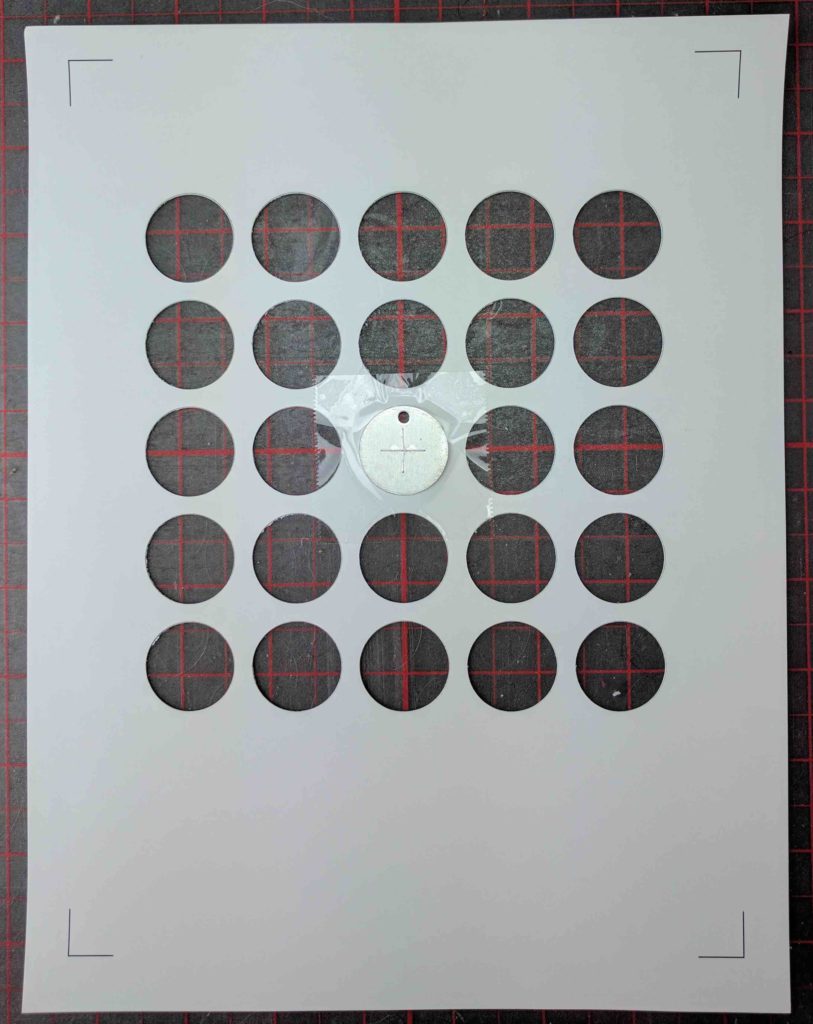
Place the piece to be engraved in the spot to correspond with the Engraving layer location. In this example, it’s in the center of the template. Securing the piece to be engraved with some double-sided tape underneath and/or packing tape on top is recommended. Don’t worry, the engraving tool will cut through the packing tape!
Once the Z-Origin is set correctly, we can move on to specifying our cut settings for each layer.
Select the Template layer and set Cut this Layer to No. We’ve already done that and now it’s fun time!
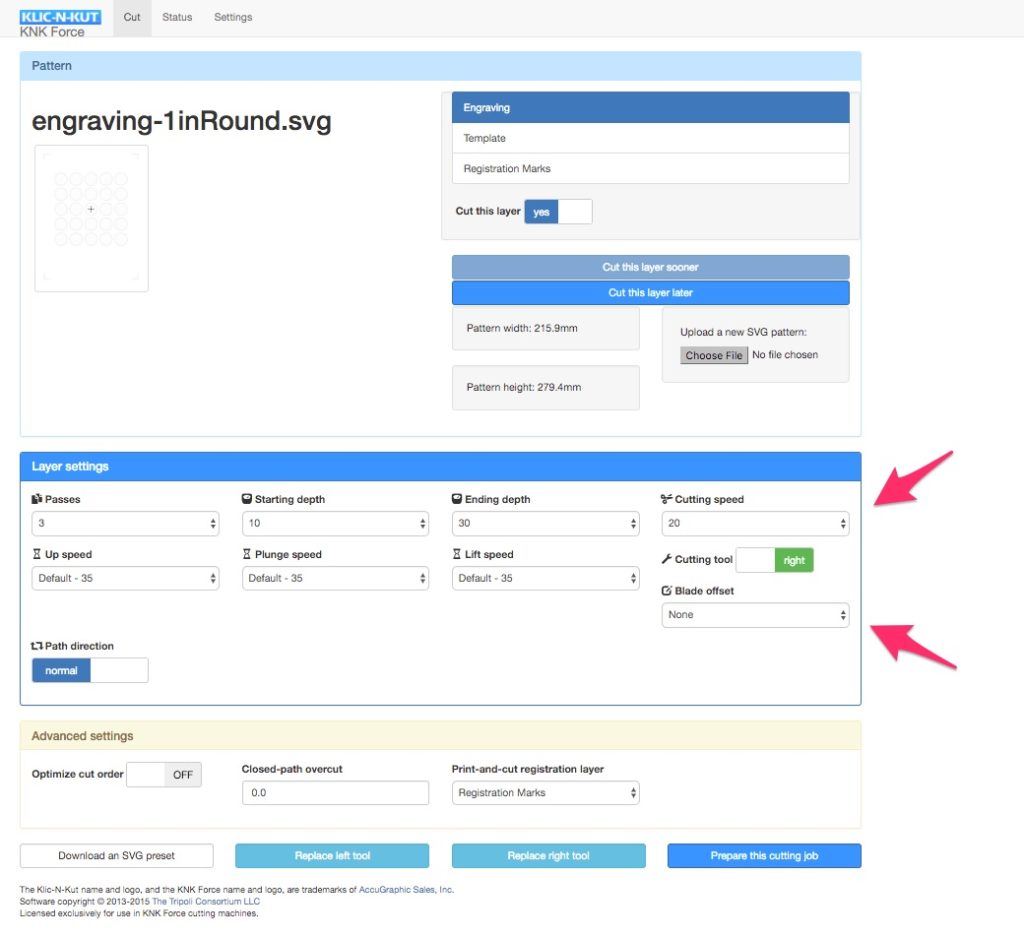
Select the Engraving layer and set Cut this Layer to Yes to display the Layer Settings panel. Set your cut settings appropriate for your material. In this example, I’m engraving an aluminum blank and my settings are pictured above.
When performing tests to determine the best cut settings for the look or effect you want to achieve, always start low and work high. Give the tool enough passes to work it’s way through the material without too much stress.
Set the Engraving layer to be cut using the Right tool, which is where my engraving too is installed. Also note that I’ve slowed my down my cutting speed a bit and set Blade Offset is set to None. I’ve also changed Closed Path Overcut to 0. The Print and Cut Registration Layer should still be set correctly from the previous template cut. If not, set it as appropriate.
With all settings correct, click Prepare this Cutting Job and again proceed through the process of identifying the registration marks as usual. This time, instead of the blade cutting the circles, the engraving tool will draw our cross right in the center of the blank.
Note: This process can be done in Sure Cuts a Lot, but it has some nuances. One issue is that SCAL’s registration marks move around based on what’s selected to be cut. It’s no problem cutting the template, but “not cutting” the template on the engraving pass will make the reg marks move and throw everything off. A quick, hacky bypass is to just remove the blade holder from the left tool holder before the engraving begins. I’ll post a better SCAL process soon.
Comments
This is a great reminder! I haven’t been on the force page much. I finally went on today and i didn’t see you ‘around’. Are you ok? Hope you are not sick or some other malady. Well, hope all is well! Take care!—Rose